- Home
- FAQ
- How to install a dishwasher air gap on my kitchen sink?
Install dishwasher air gap
| How to install the dishwasher air gap on my kitchen sink? |
|
How to install the dishwasher air gap on your sink? The funciton of a dishwasher air gap is to prevent the contaminants in the sink from flowing into the dishwasher and to prevent the back flow from the drain hose to your dishwasher. But how to install the air gap? Here are some tips for you to install the dishwasher air gap easily. When you get the dishwasher air gap from the hardware store or plumbing stoer, this is what it contains. Disassemble each part and you will get as bleow. (Usually, only one decorative cap). 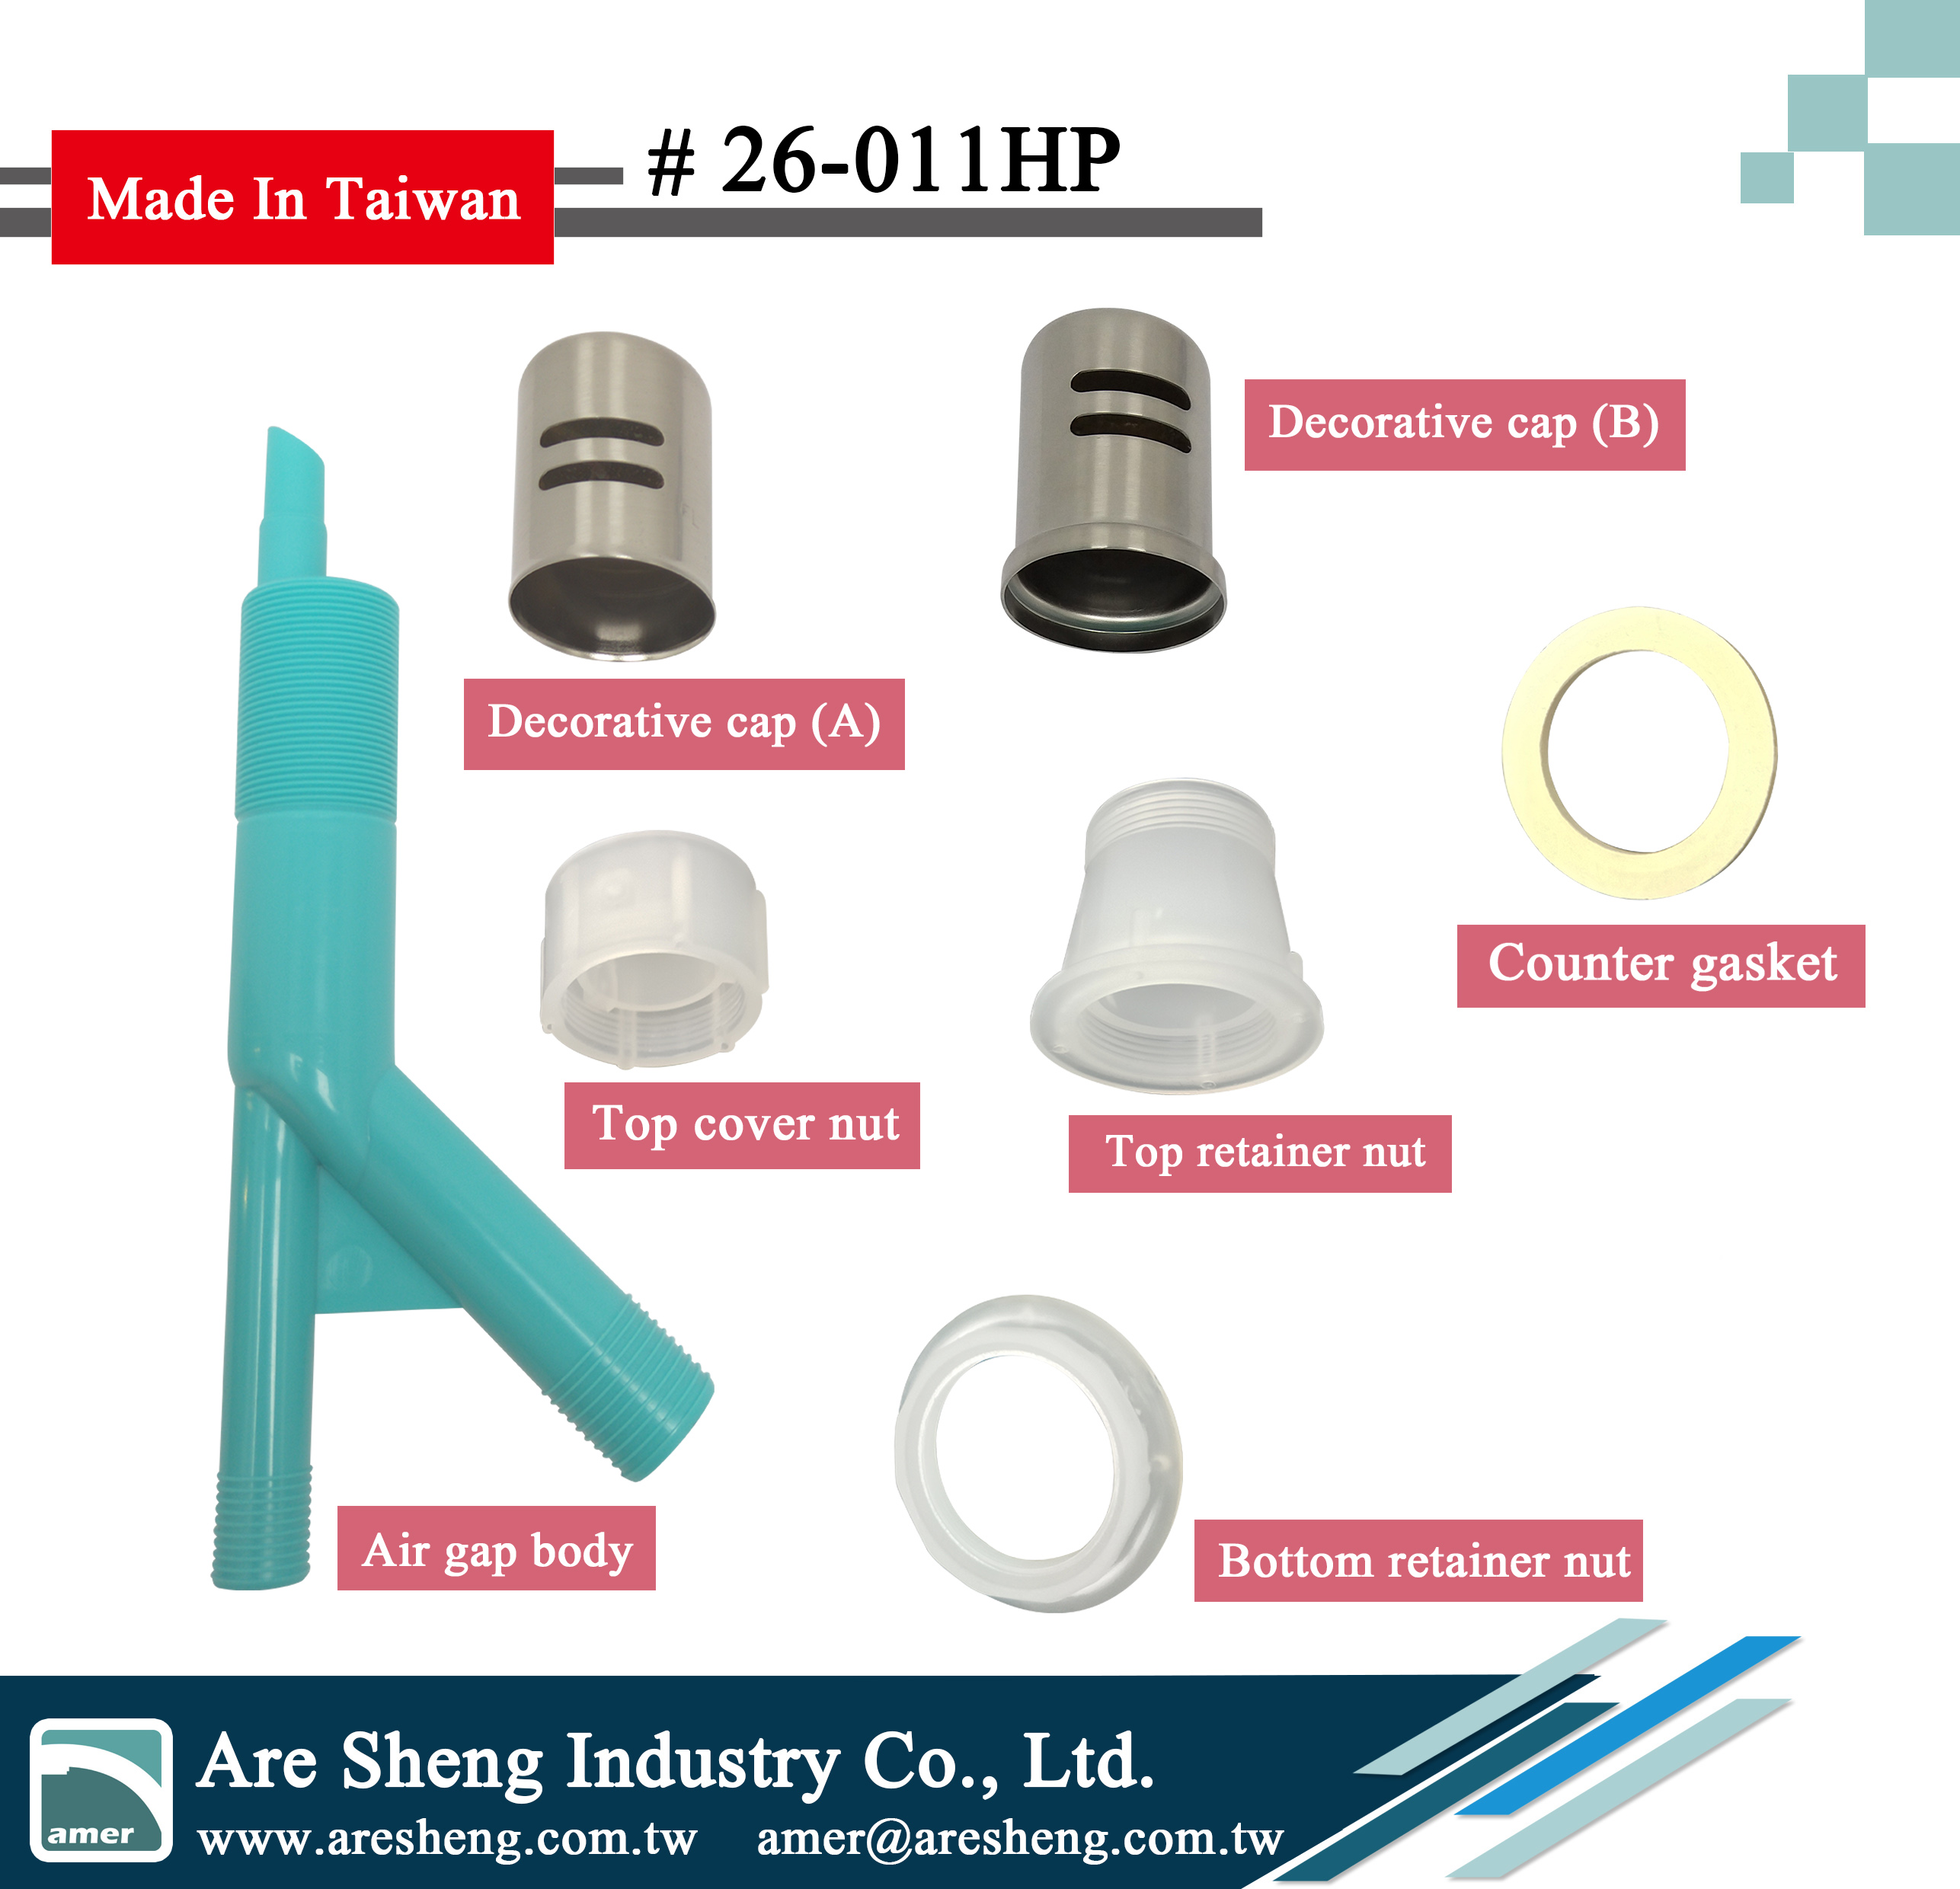 Here is a drawing to show the sequence of installation. 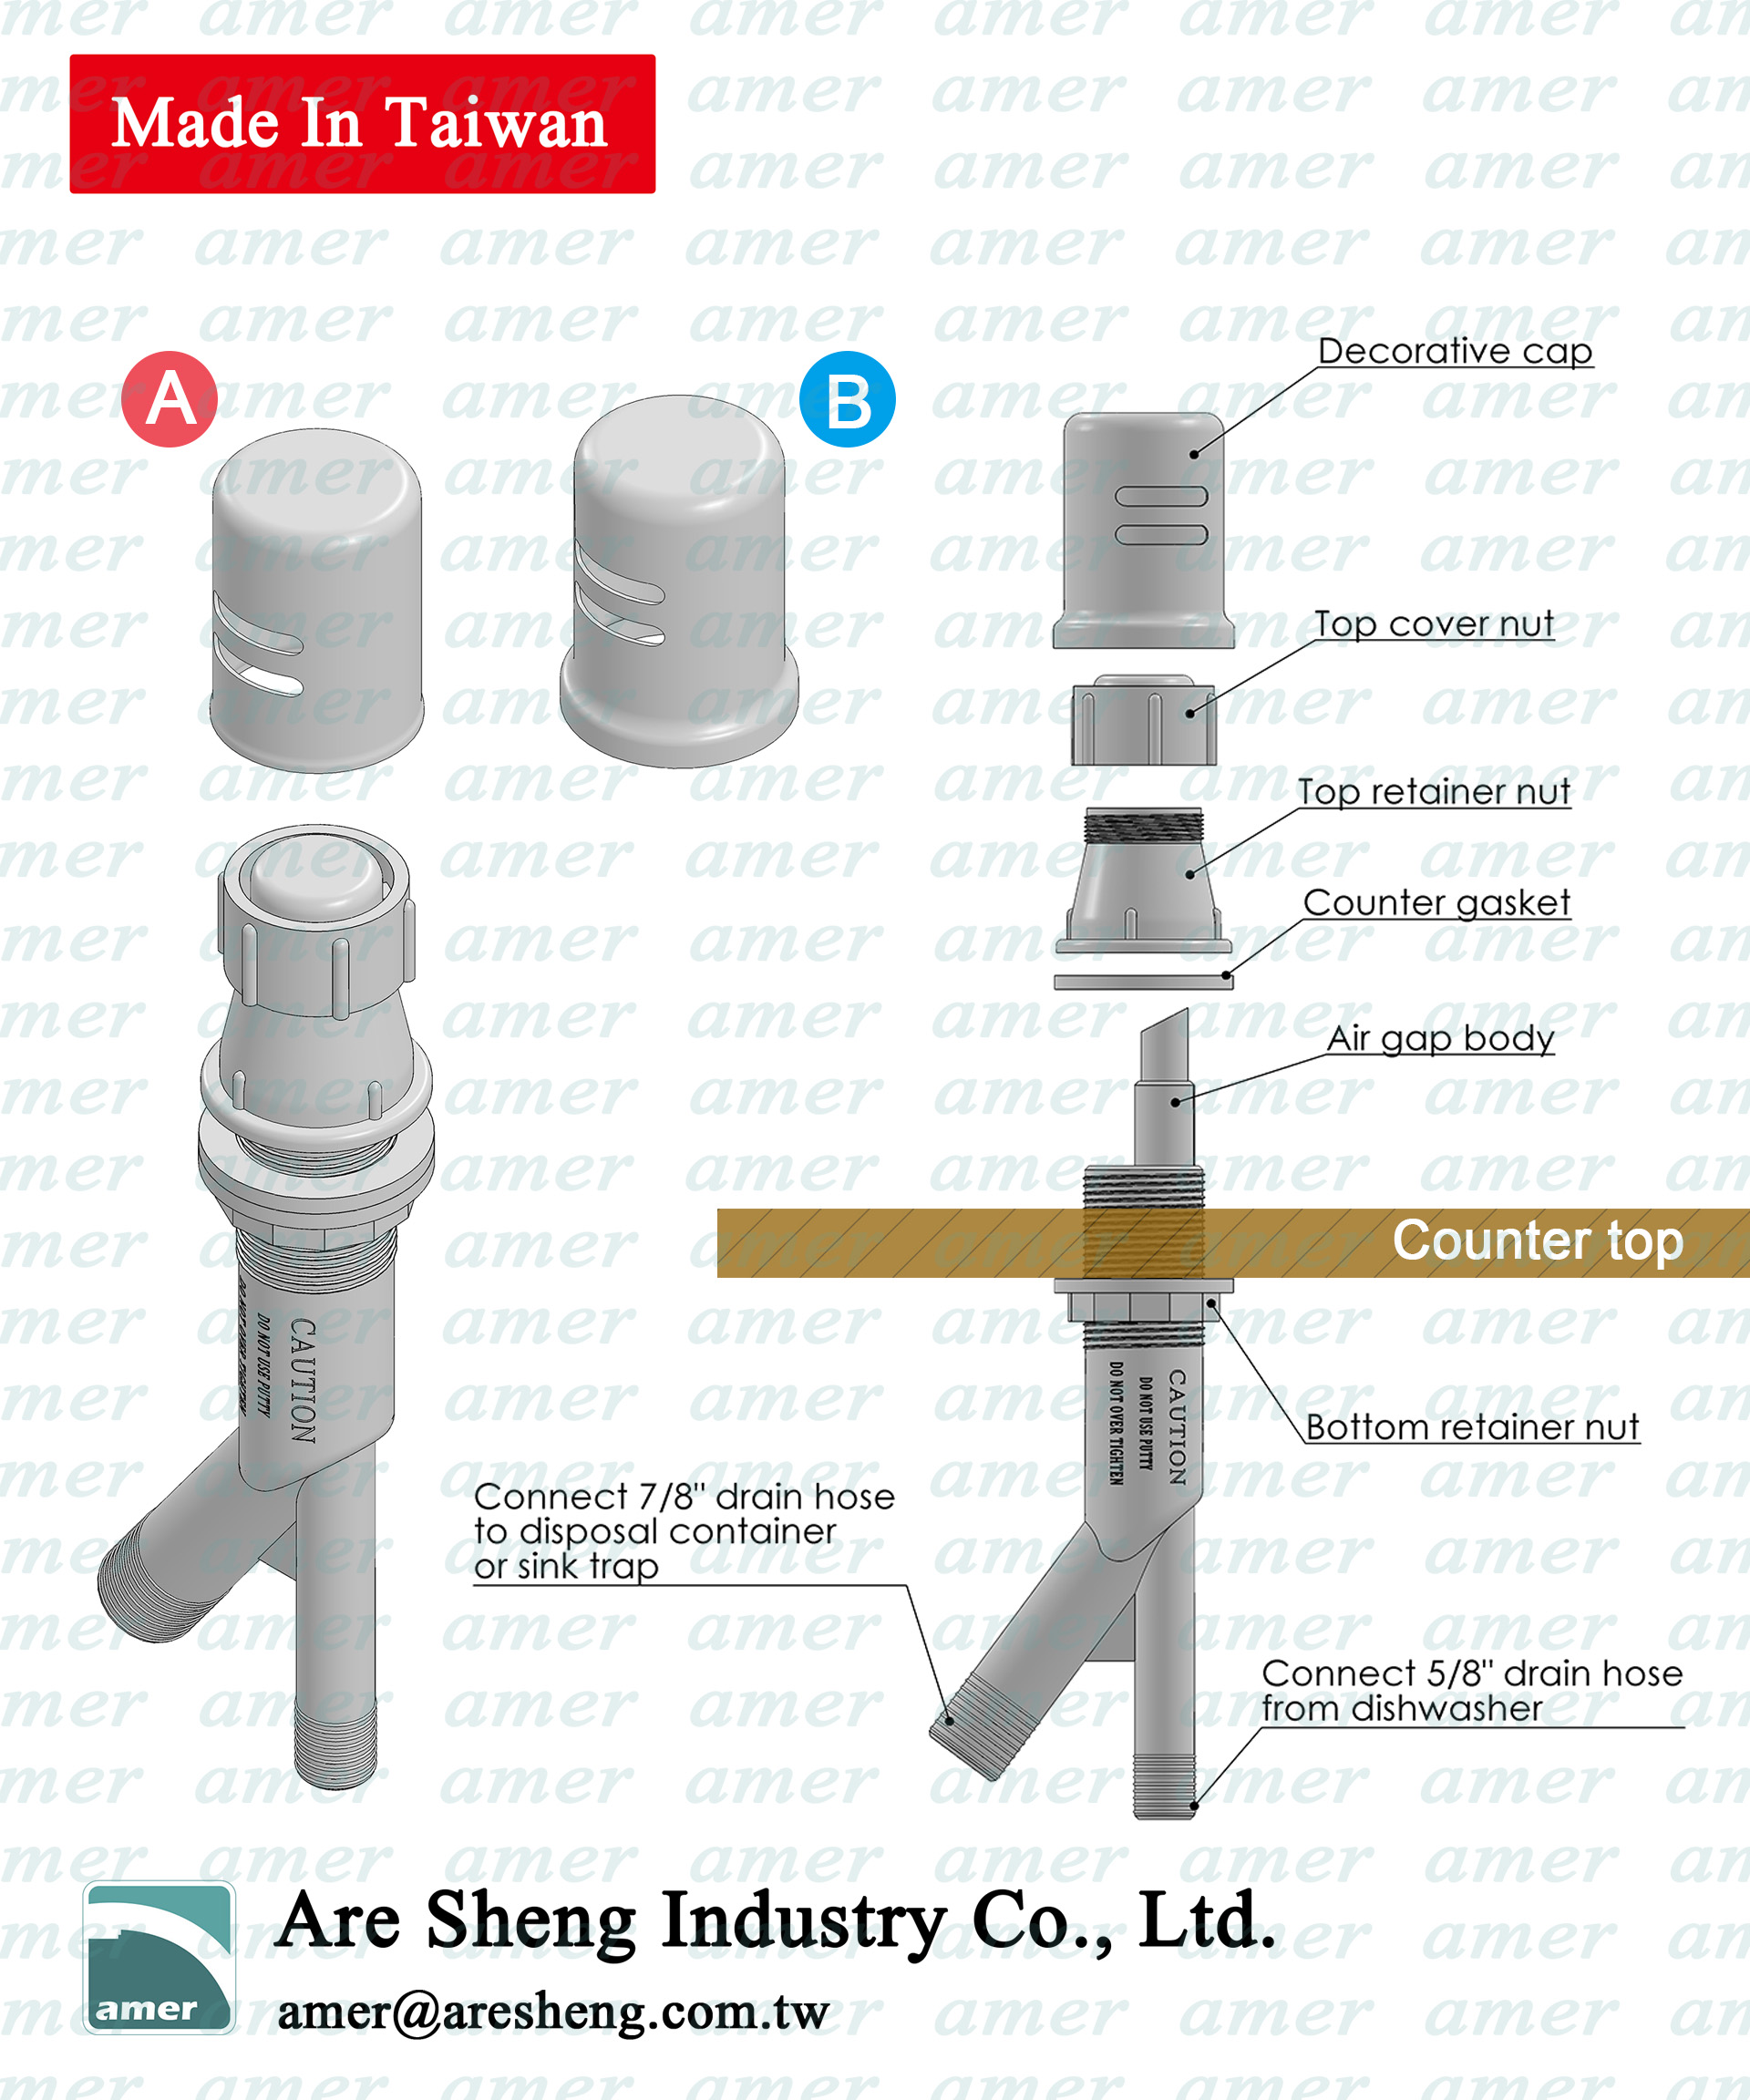 Installation Instructions Step 1: Preparation 1. Remove the kits from the air gap, including decorative cap (A), top cover nut (B), top retainer nut (C), and the counter gasket (D) while remain the bottom retainer nut (E) on the air gap. 2. Adjust the bottom retainer nut (E) for sink thickness. 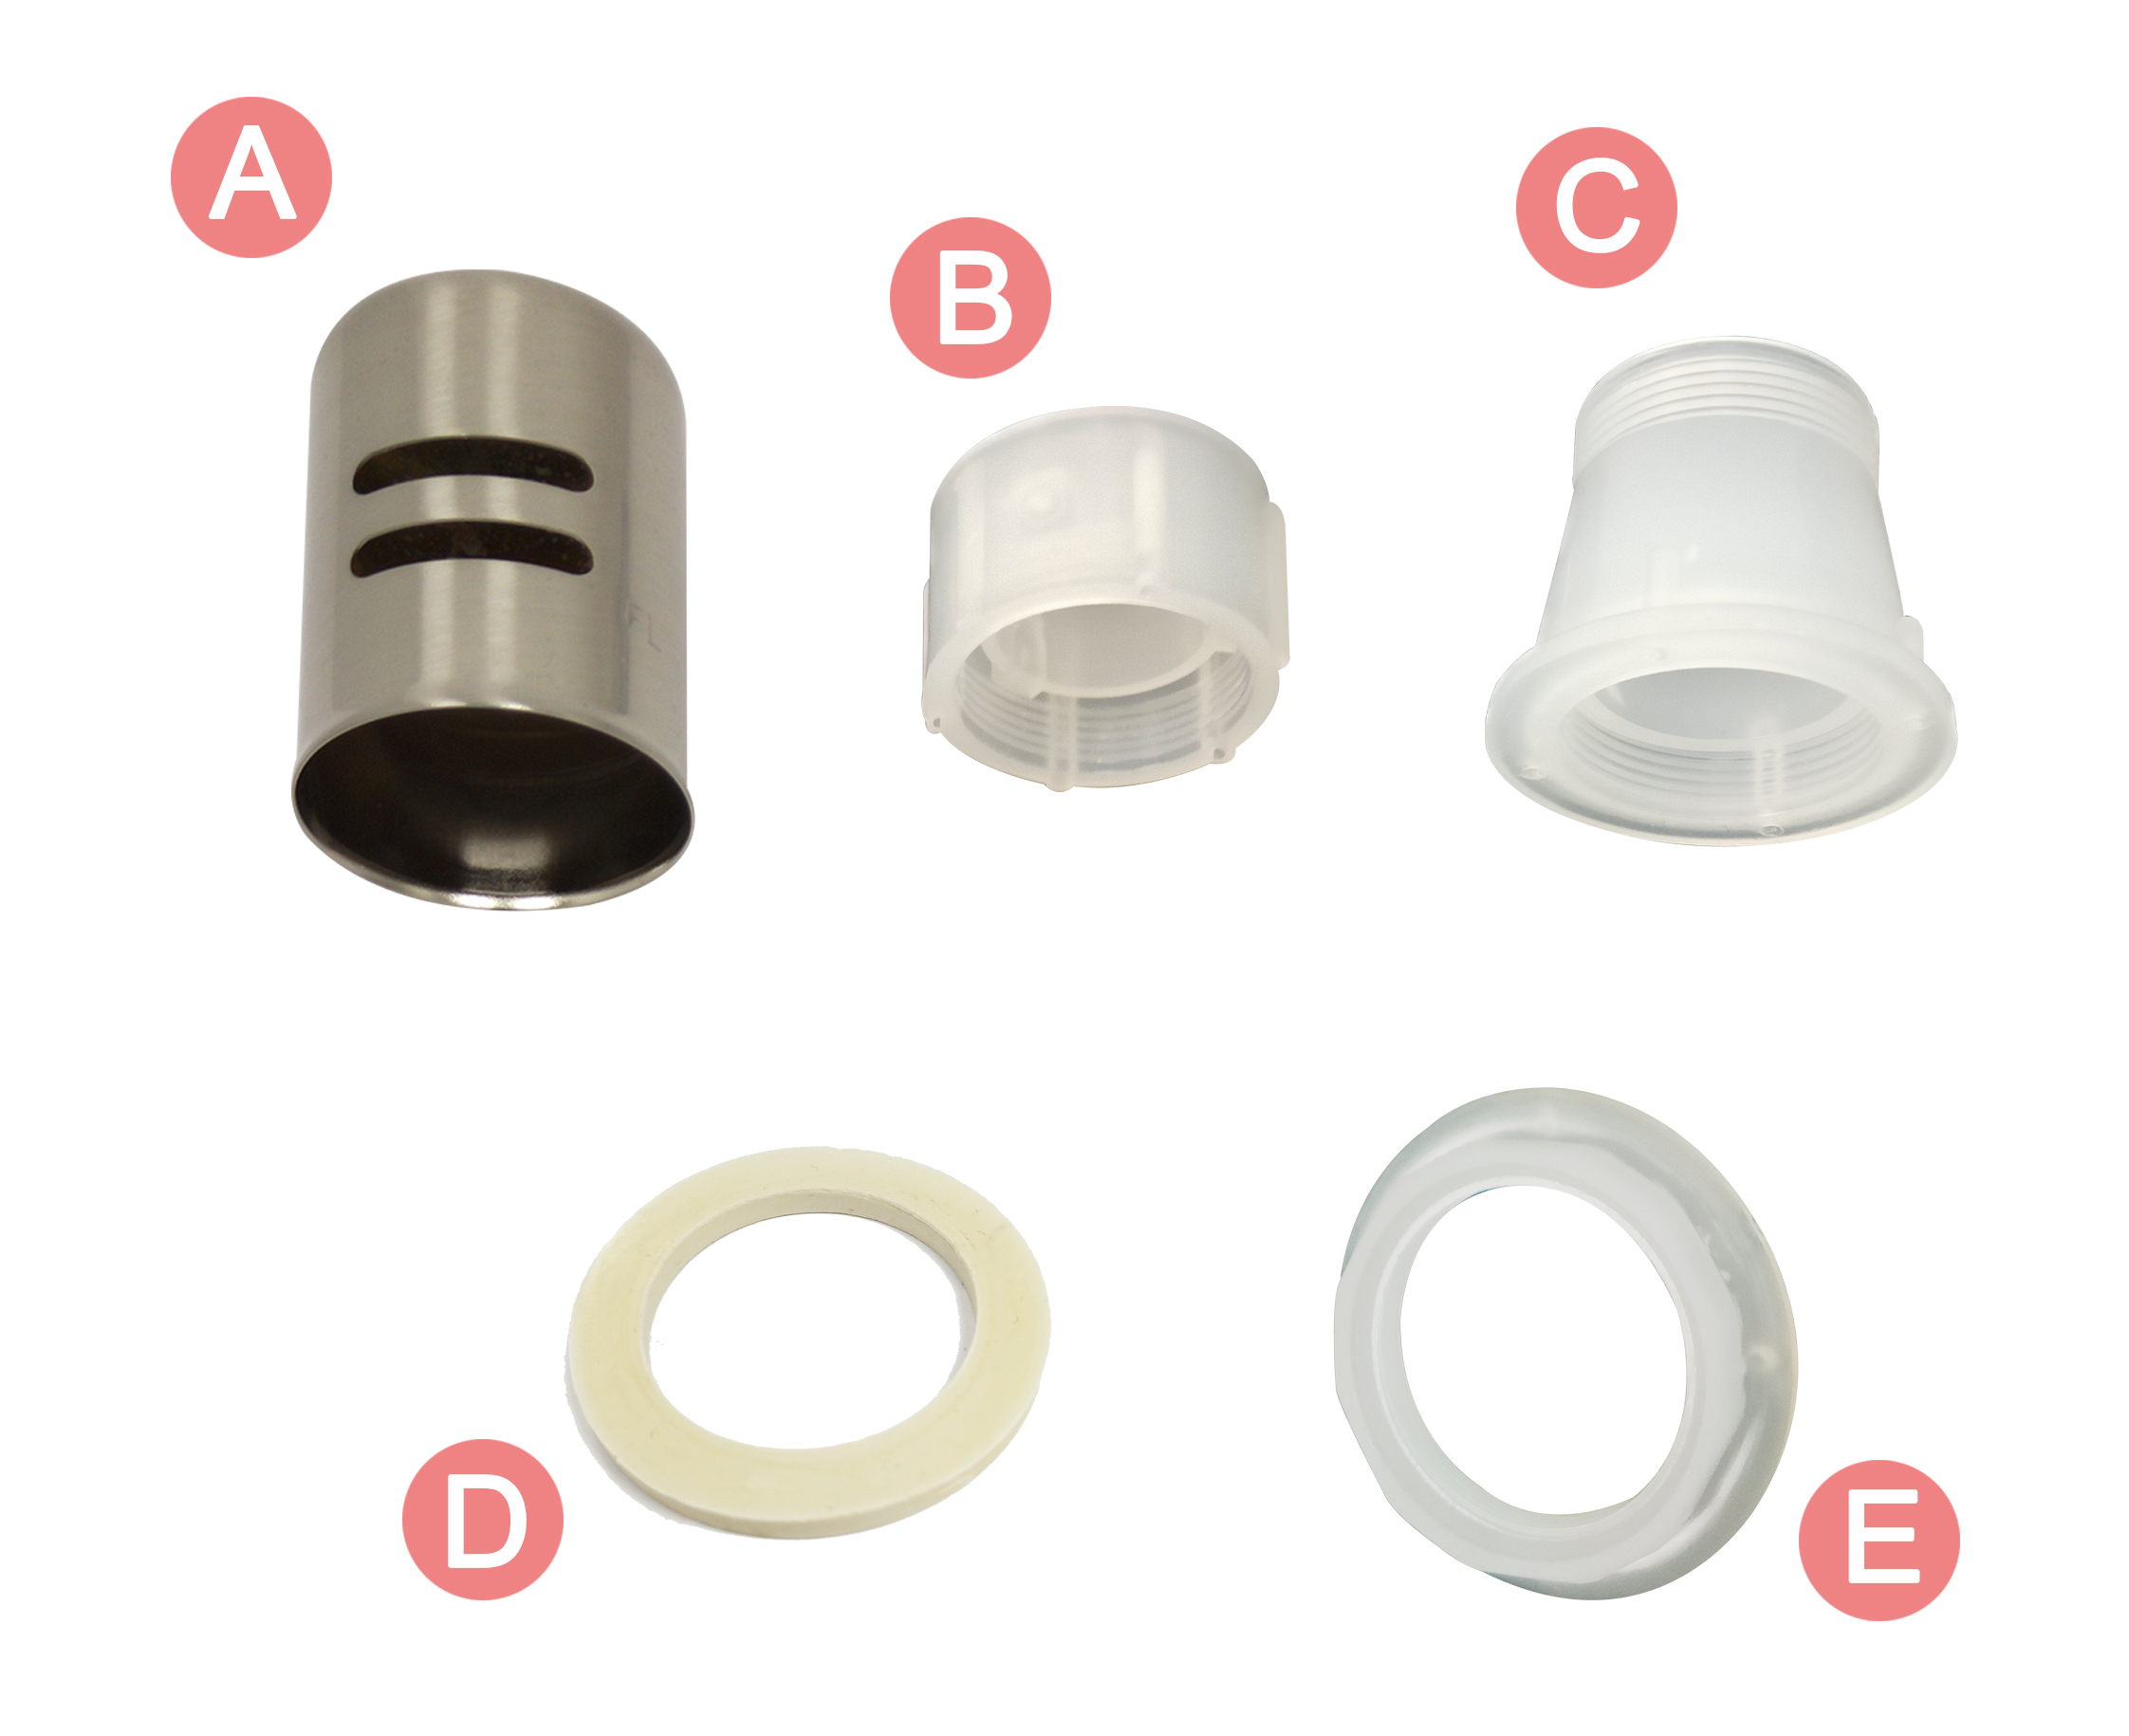 Step 2: Install the kits 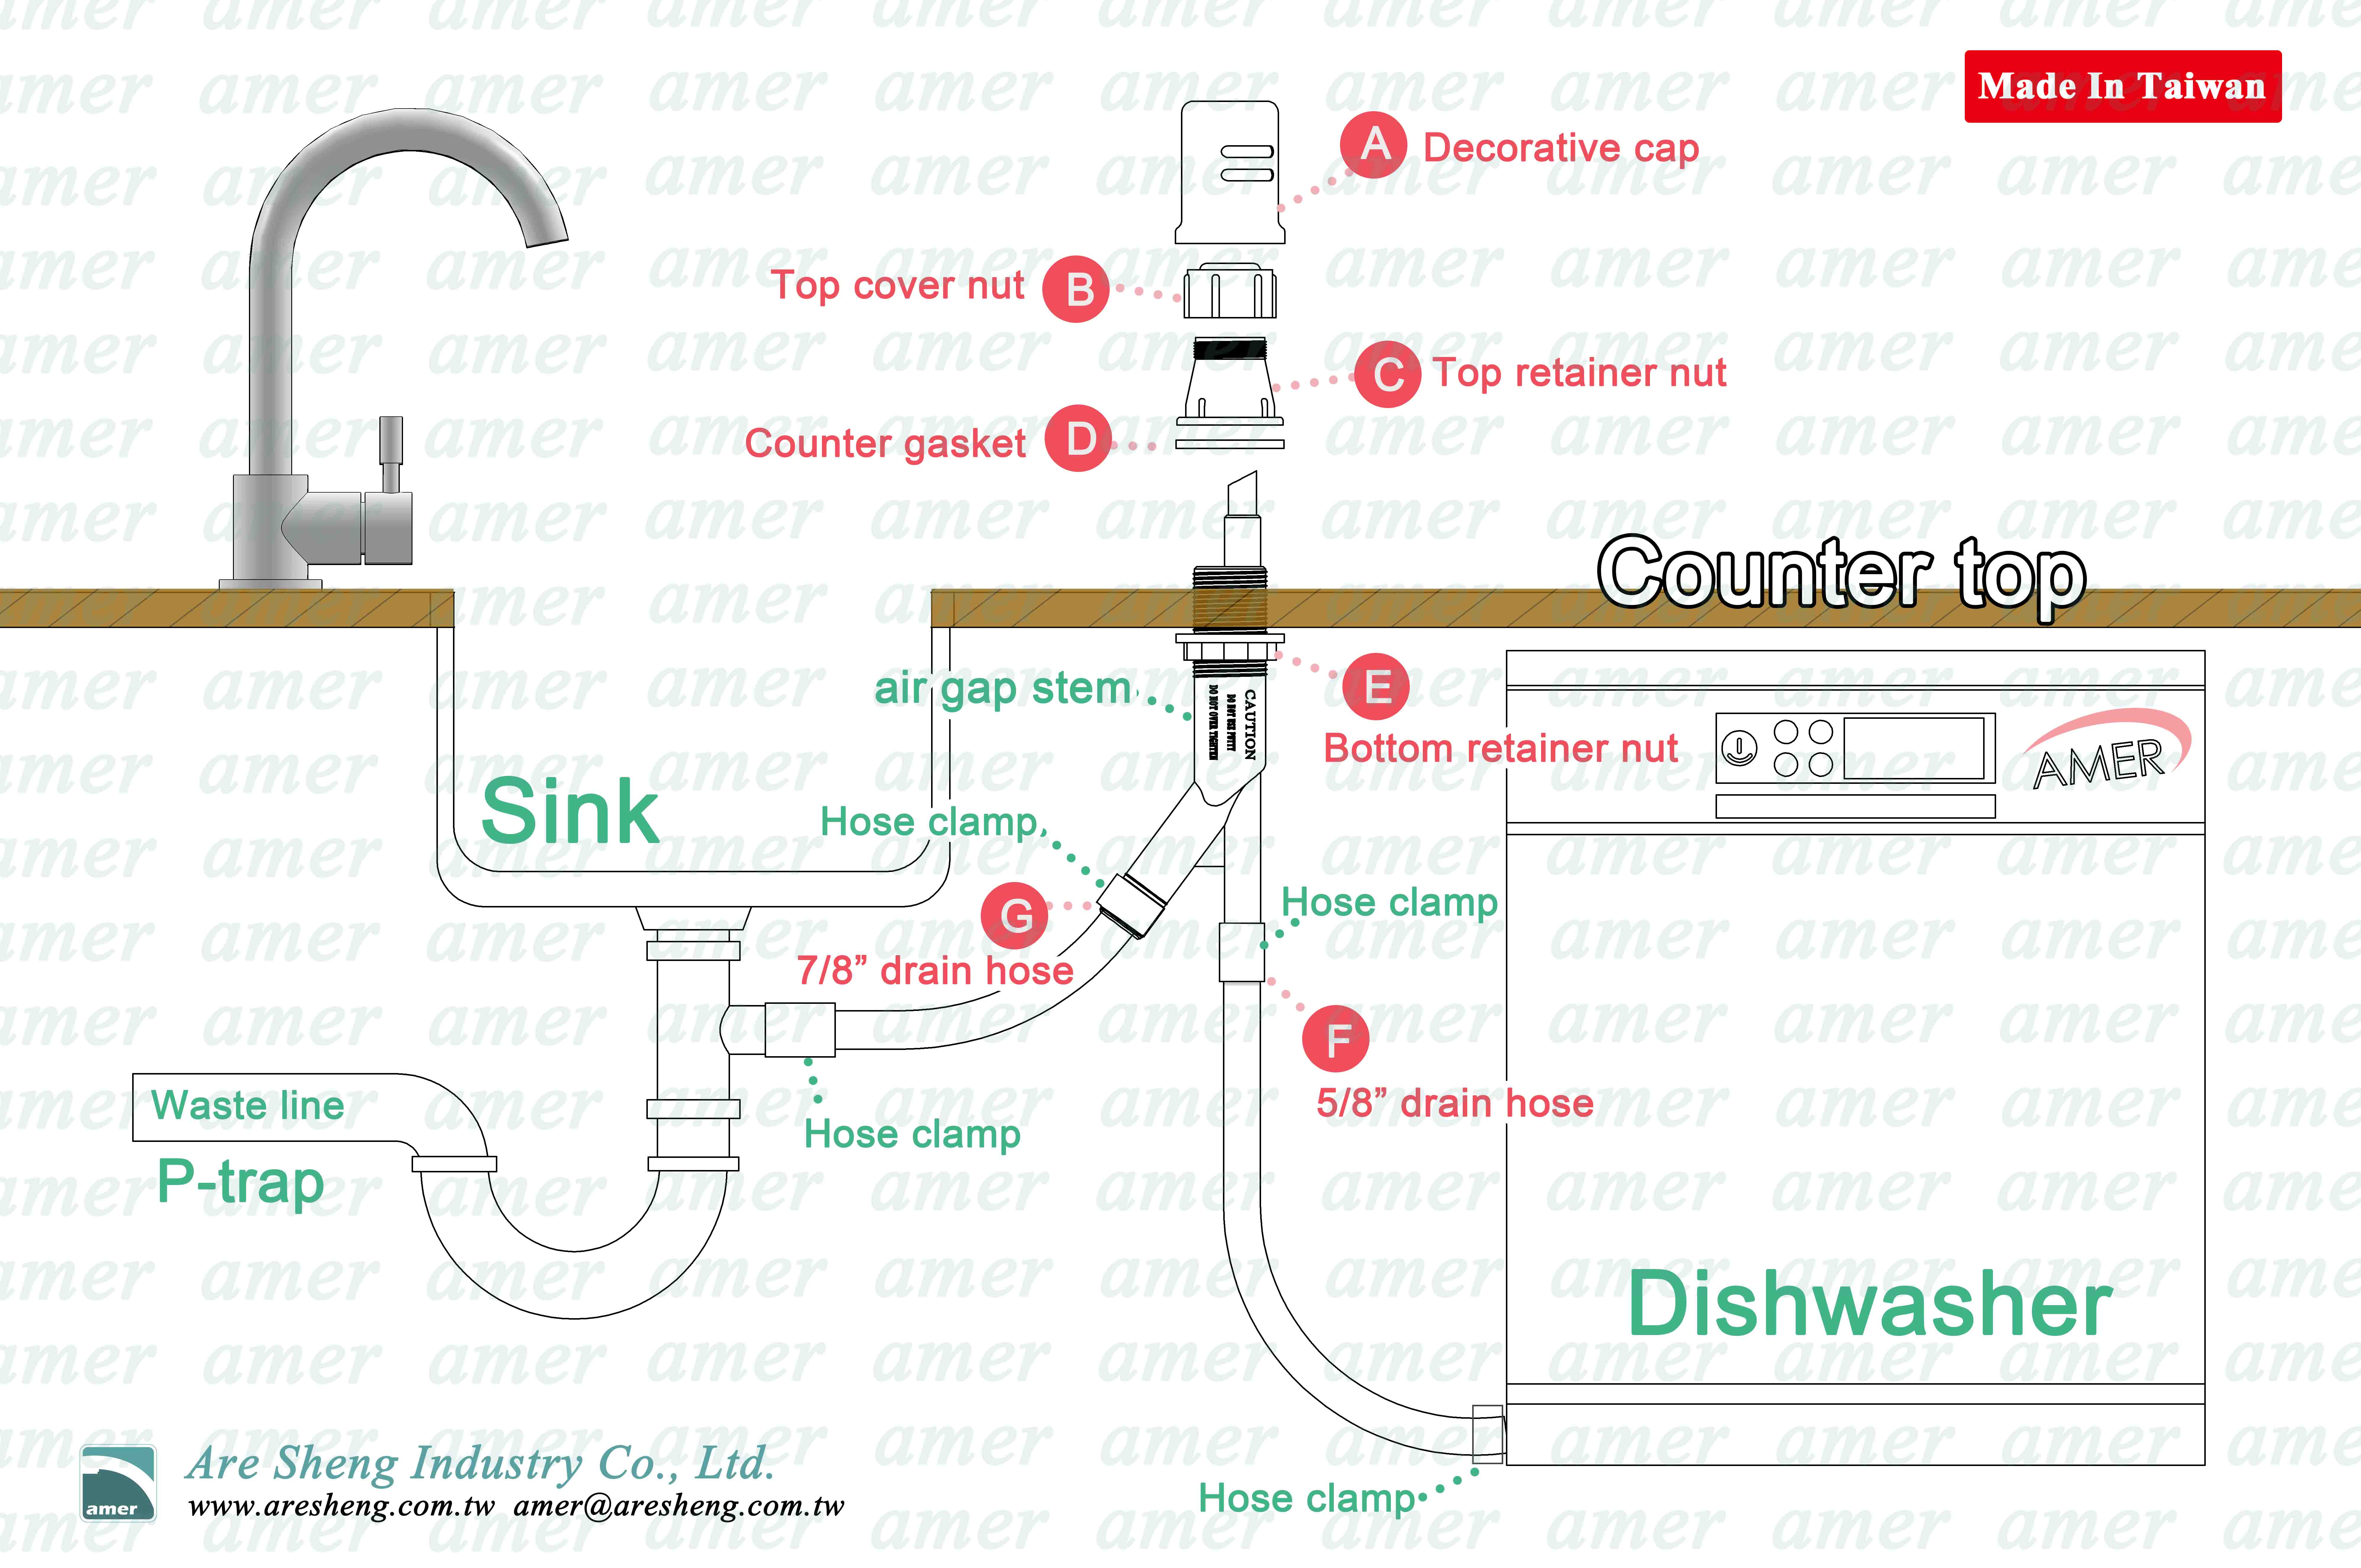 3. Install the air gap through the hole in your sink. 4. Place the counter gasket (D) into the air gap stem on the counter top. 5. Then, screw the top retainer nut (C) into the air gap stem above the counter gasket (D). 6. Hand-tighten the bottom retainer nut until all these kits are tight. 7. Connect the 5/8” inlet drain hose (F) to the dishwasher pump line. 8. Connect the 7/8” outlet drain hose (G) to either your garbage disposal or waste line.    Step 3: Finishing up 9. Secure the hose ends with hose clamps. 10. Screw on the top cover nut (B) and press on the decorative cap (A) on the top of the air gap. 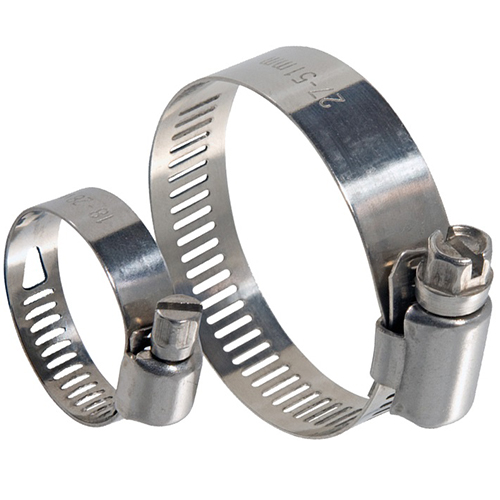 For the product specification of this dishwasher air gap, please link to the product page here. For any further product information, send me the inquiry at [email protected] (Attn: Emma) |
